When an Inspection Repair Uncovers More
Some jobs start small — and then the house tells you the rest of the story.
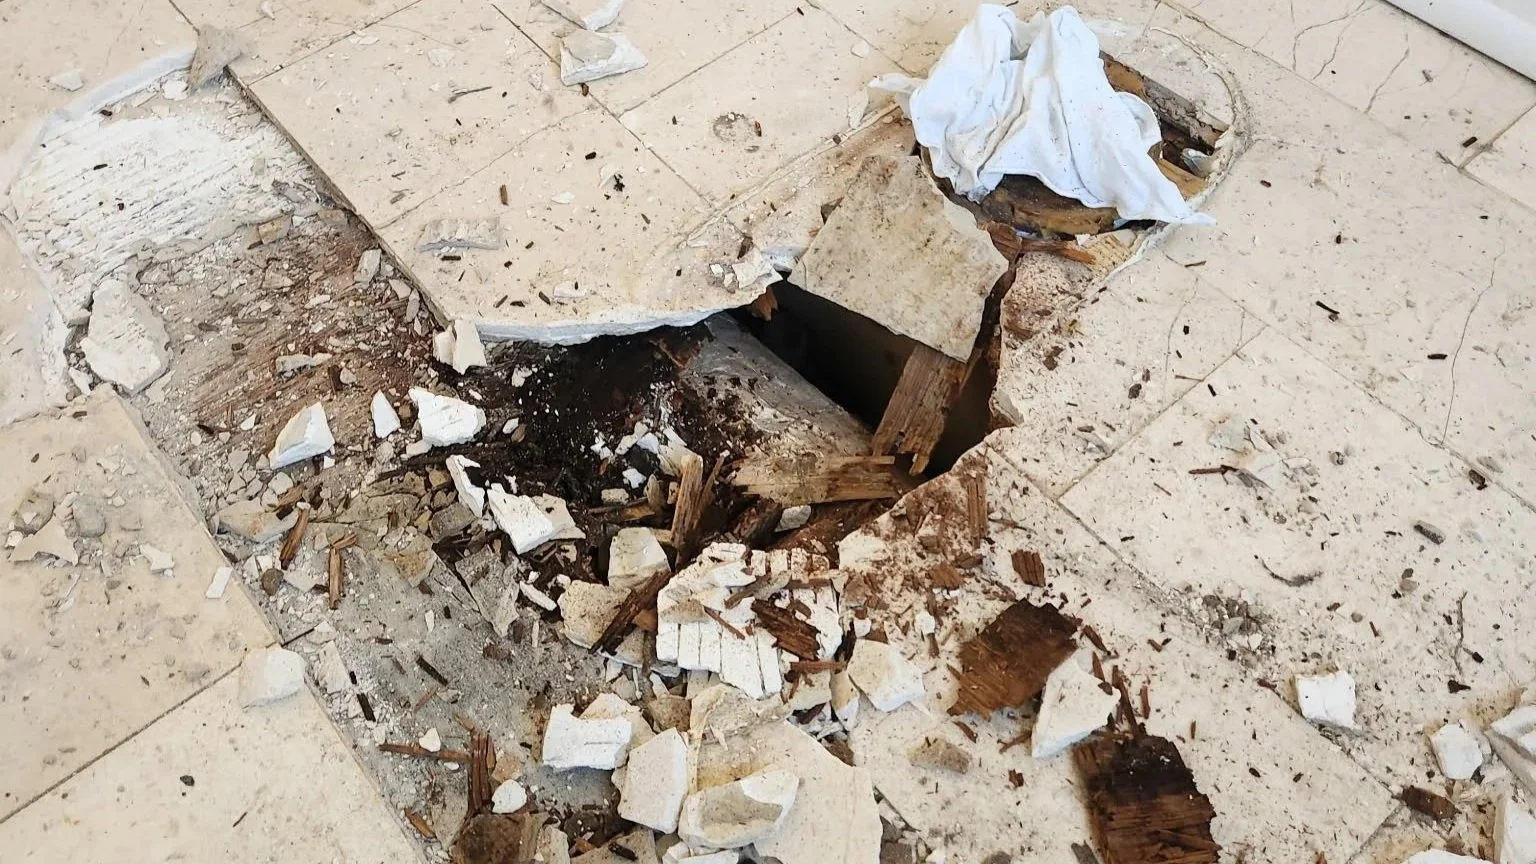
Step 1: Identifying the Problem
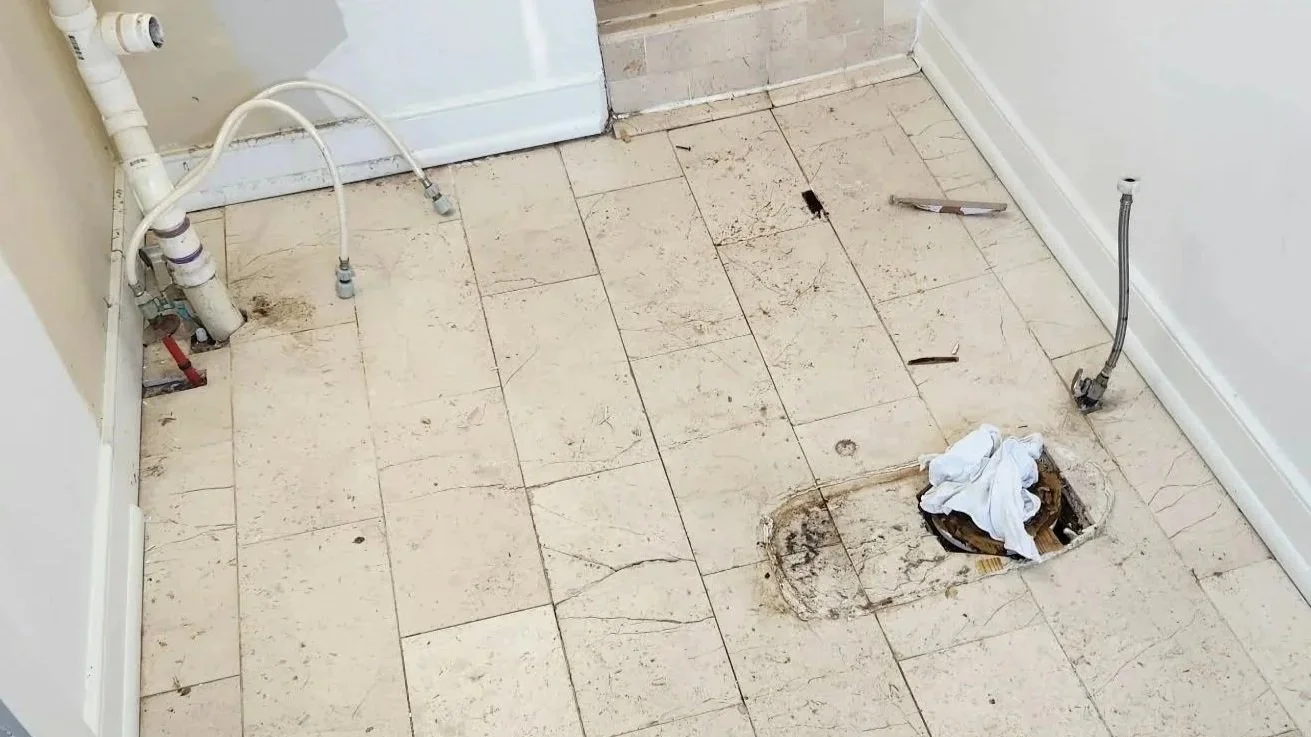
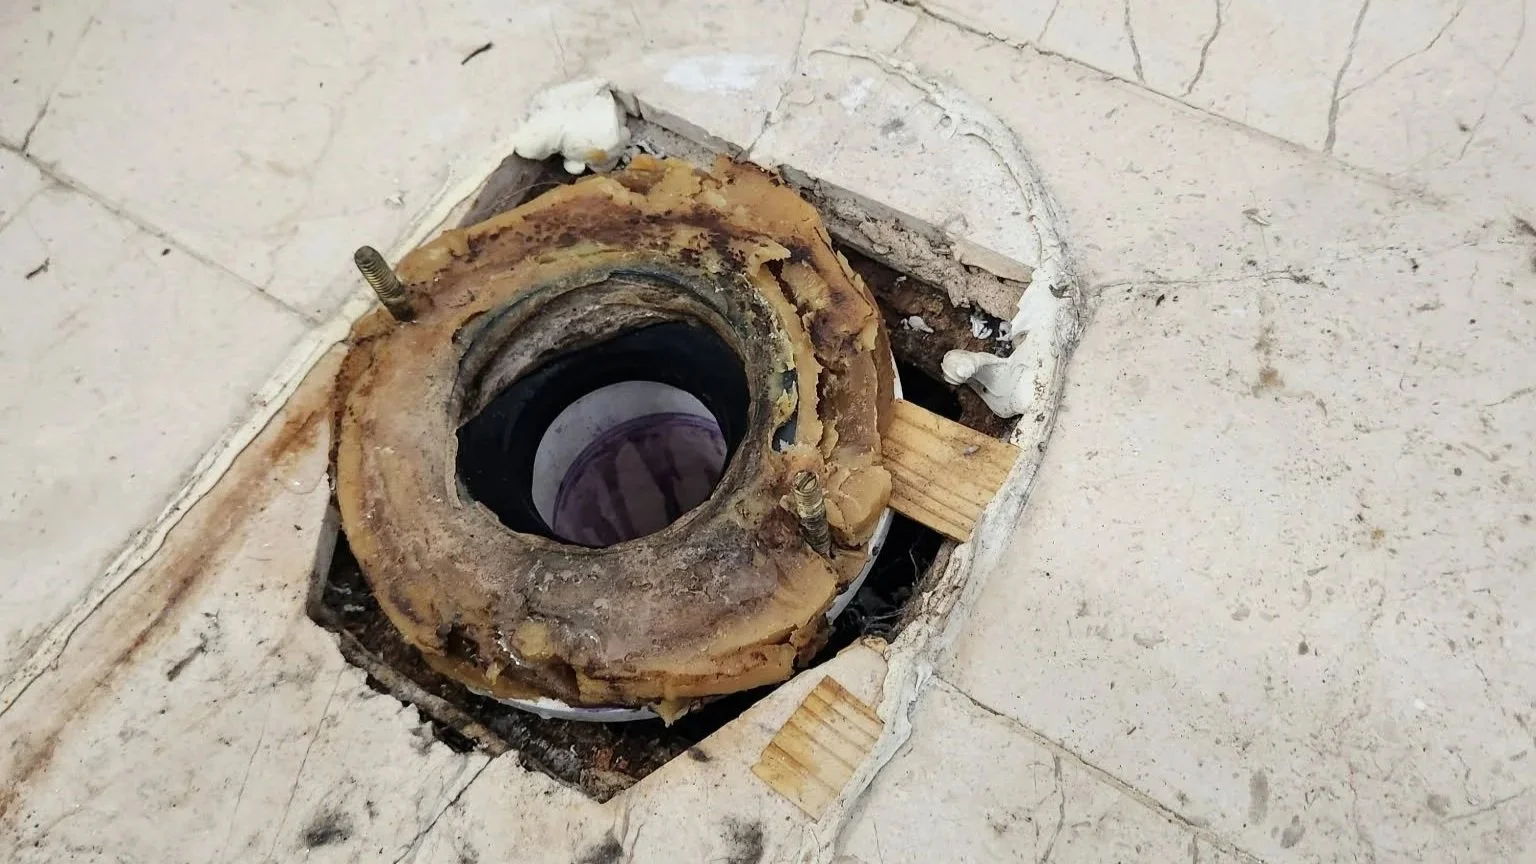
As soon as we pulled the toilet, we found rotted subfloor around the flange. The damage wasn’t just cosmetic — the wood was soft, compromised, and no longer safe to build on.
This room had originally been a porch that was later converted into a bathroom, so the framing and subfloor in this area were already less than ideal. Once everything was exposed, it was clear this was no longer a simple repair.
At that point, we paused work immediately and contacted both the homeowner and the realtor.
Step 2: Same-Day Communication & Change Order
We believe surprises should never be silent.
We explained what we found, walked through the available options, and sent out a same-day change order so everyone could make an informed decision without unnecessary delays.
Once approval was received, we got right to work. This quick communication helped keep the situation calm and avoided last-minute stress for both the homeowner and the agent.
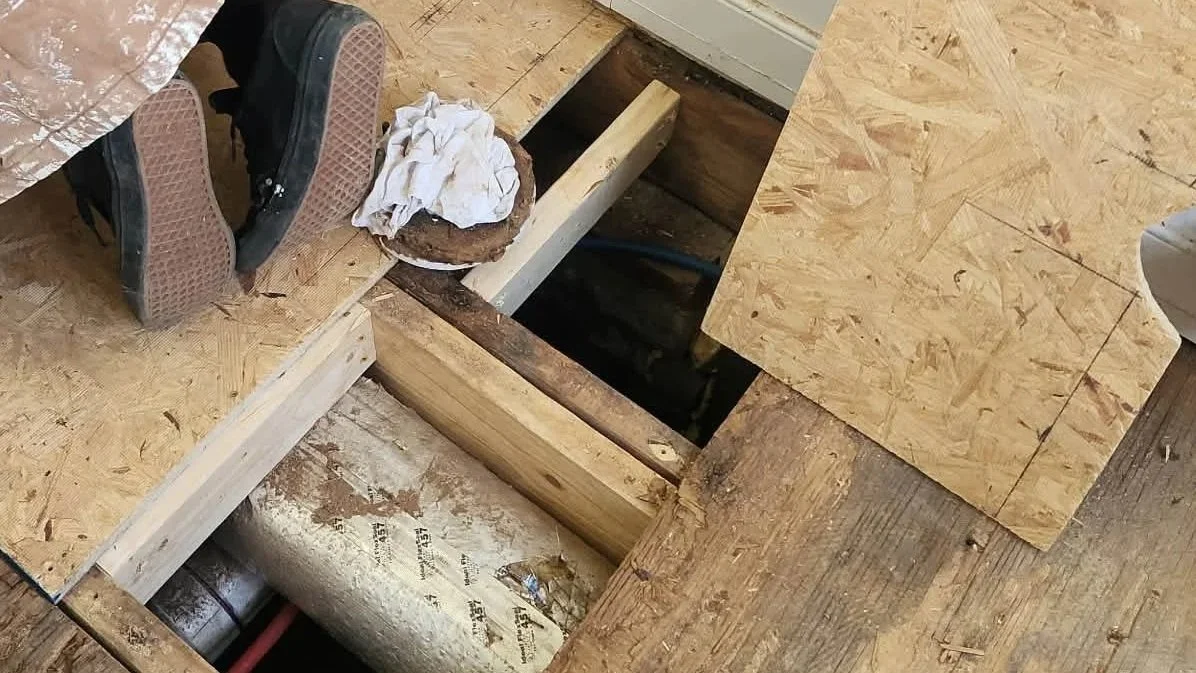
Step 3: Removing the Damage
All rotted material was completely removed — no shortcuts and no covering up bad wood.
As we opened the floor further, we also discovered the bathroom had a noticeable slope toward the center, which explained why it had always felt off underfoot.
Step 4: Structural Repairs & Floor Correction
Since the floor was already open, we addressed the underlying structure.
We jacked the sagging area, sistered multiple floor joists, and corrected the slope so it was no longer noticeable. Because this bathroom was originally a porch, the framing wasn’t built to modern bathroom standards.
Fixing this now ensured the repair would last and gave us a solid foundation to build on.
Step 5: New Subfloor & Flooring Installation
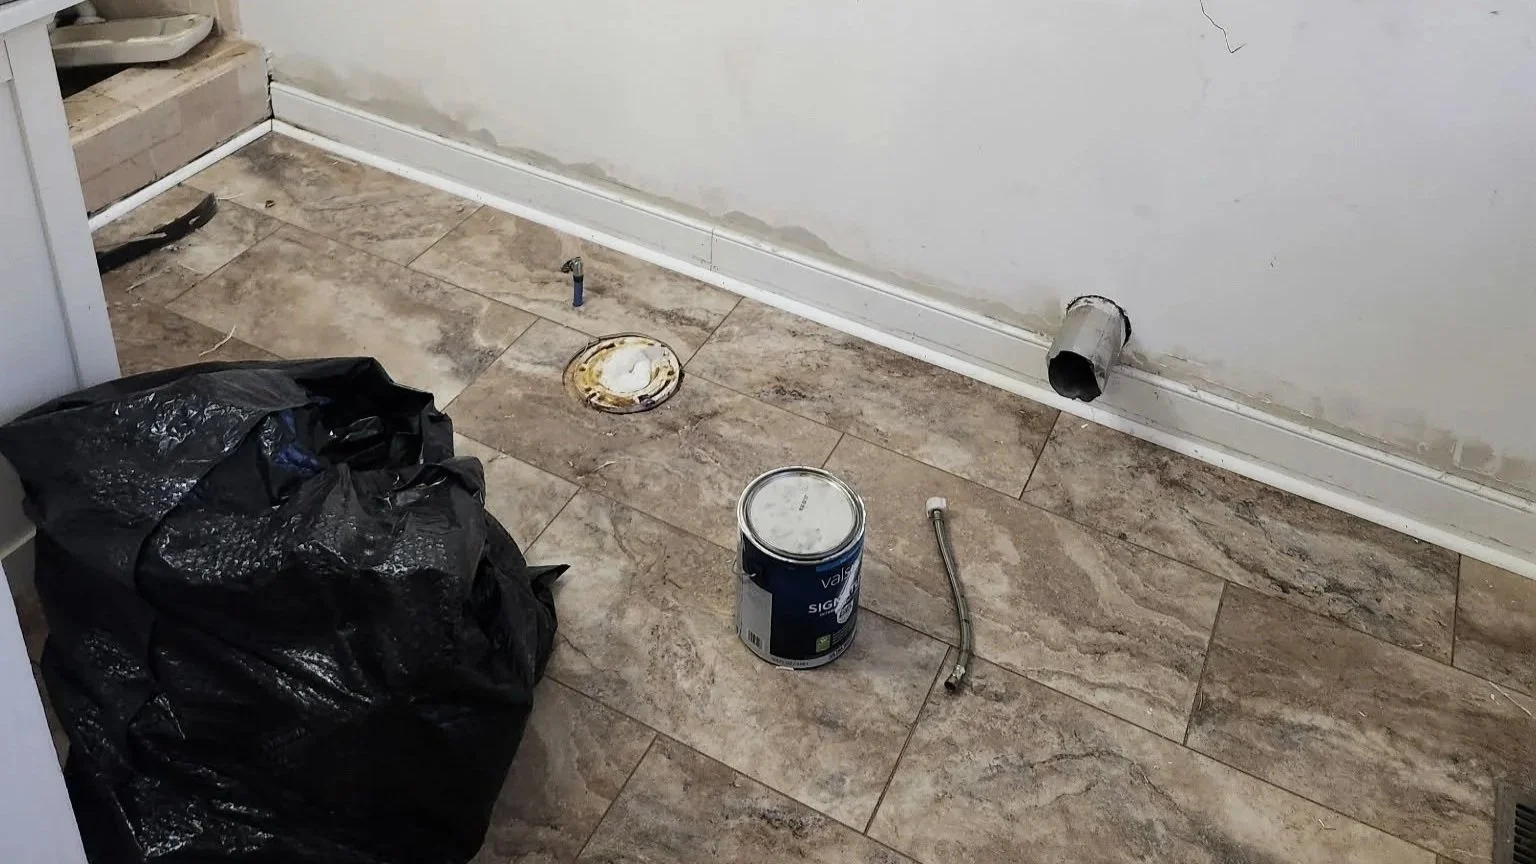
With the structure stabilized, we installed new solid subfloor throughout the affected area.
The original tile was removed entirely and replaced with a cost-effective luxury vinyl tile (LVT). This option provides durability, water resistance, and a clean finished look that works well for post-closing inspection repairs.
Because of the height difference between the old and new materials, we also adjusted the trim, installed new shoe molding, and made sure all transitions looked intentional and finished.
Step 6: Fixtures, Paint, and Additional Improvements
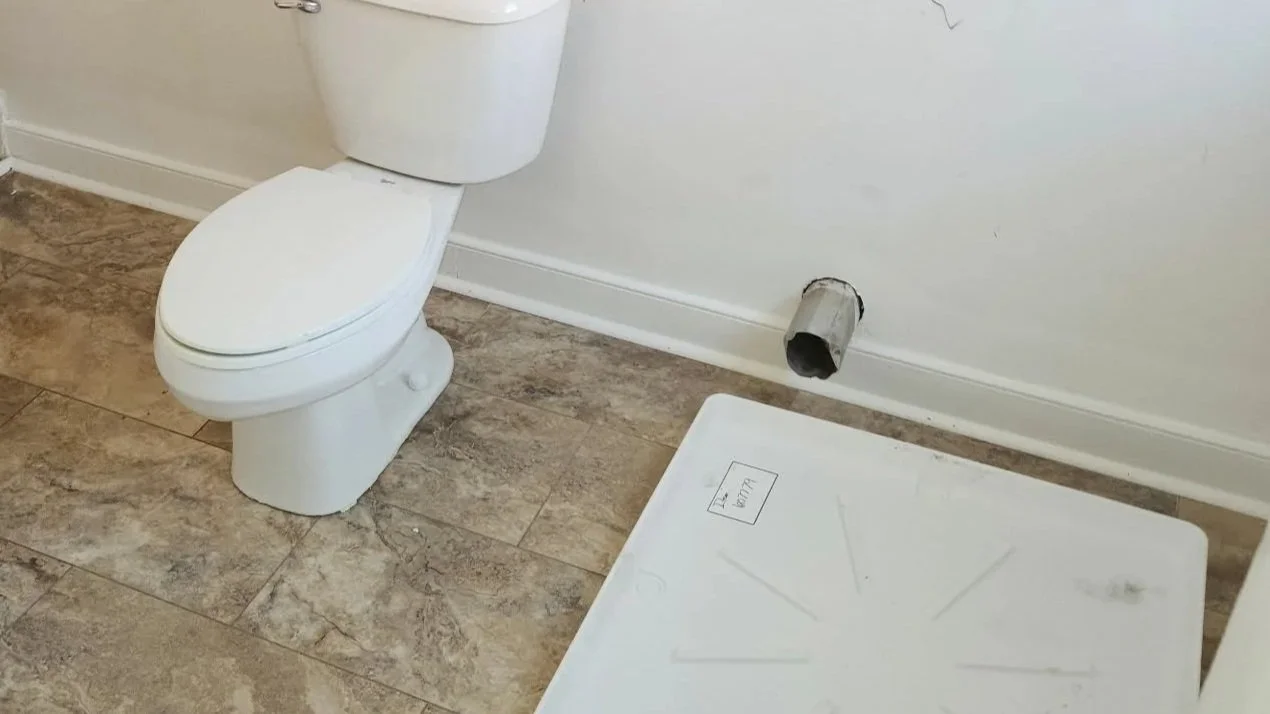
While we were onsite, we took care of several additional items to fully button up the space:
Reinstalled all bathroom fixtures
Replaced a broken vanity top
Painted the area where a mirror had previously been removed
Installed proper drainage for the washer/dryer pan in this area
Handling these items at the same time helped prevent future issues and ensured the space was fully functional for the new homeowner.
The Final Result
What started as a post-closing inspection repair turned into a full floor and structural fix — handled quickly, clearly, and the right way.
By communicating early, addressing the root cause, and finishing the space cleanly, we helped the homeowner move forward with confidence and allowed the realtor to close the loop without lingering concerns.
Why This Matters for Realtors
Inspection repairs don’t always stay small — especially in older homes or converted spaces.
Our goal is to be the contractor realtors can rely on when the unexpected shows up. We focus on clear communication, fast approvals, and solid repairs, so problems don’t turn into delays or added stress for your clients.